Vous pouvez consulter un aperçu des documents imprimés sous Space > Printers > Print Job. Vous pouvez y voir le statut de tous les documents.
Il peut arriver que vos documents présentent des problèmes parce qu’ils ne remplissent pas les conditions requises pour être envoyés et traités par Pingen.
Si le statut de la tâche d’impression ne passe pas à l’état Successful, vous devez déterminer ce qui doit être modifié sur votre document pour qu’il soit imprimé.
Pour cela, connectez-vous à votre compte Pingen et accédez à Lettres. Vous y trouverez un aperçu des lettres imprimées.
Dans la colonne Statut, vous pouvez voir l’état de la lettre. Vous pouvez en savoir plus sur les statuts Pingen en lisant dans ce lien.
Vous trouverez plus d’informations sur la façon de résoudre les problèmes dans un tableau de bord Pingen sur ce lien.
Pour en savoir plus sur les modèles utilisés pour restituer les documents PDF, consultez le en savoir plus ici.
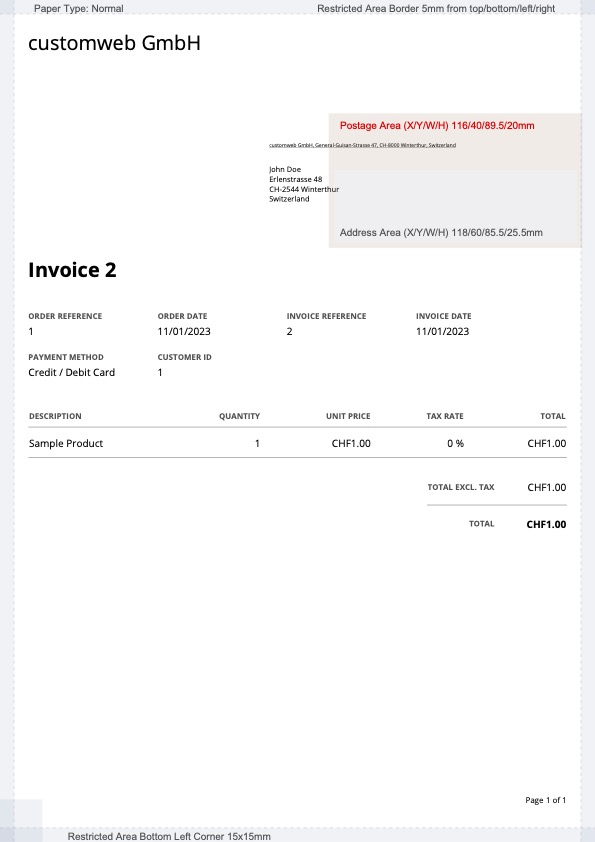
Si le statut d’une lettre est Action Required et que le problème est que l’adresse est mal positionnée, la solution suggérée serait de mettre à jour le modèle de document pour répondre aux exigences de Pingen.