The Singup documentation explains how you are able to get your own Datatrans account. This is a requirement in order to start processing transactions.
Before you can start with the acceptance of payments via the Datatrans you require a Datatrans Account. You can get this account under the following URL: https://www.datatrans.ch/.
Once Datatrans has created an account for you, you will provided with a test and live account and the following credentials:
-
Datatrans Test & Live Merchant ID
-
Username
-
Password
This information is required to login to the administration backend. Find below the URL to the test and live environment.
-
Test environment: https://admin.sandbox.datatrans.com/
-
Live environment: https://admin.datatrans.com/
The administration account lets you view the transaction and create user accounts and perform other administrative operations.
To test your integration you can follow two strategy:
-
Either you create on processor configuration and configure the test details and have the operation mode in test. After you successfully tested the integration you exchange the settings for the live account.
-
You can create two processor configurations one for live and test. Once your tests are successful, you disable the processor and connector configurations for the test and make sure that you use the live configuration.
More Information about testing strategies can be found in the payment documentation.
More Test cards for Datatrans can be found in the documentation.
|
Note
|
Make sure you switch into live mode, because transaction in the test mode are not processed. |
The following documentation will guide you through the necessary steps to set up the Datatrans Processor and Connector Configuration.
In order to set up the Datatrans Processor follow the following steps carefully. Go to Space > Payment > Configuration > Processors and add the processor. Search for Datatrans in the Dropdown field.
First of all you have to set the Datatrans Merchant ID which you find on the top of your login screen. It is normally a 10-digit number like this 1100005635. Live accounts normally start with a 3 and test accounts with a 1.
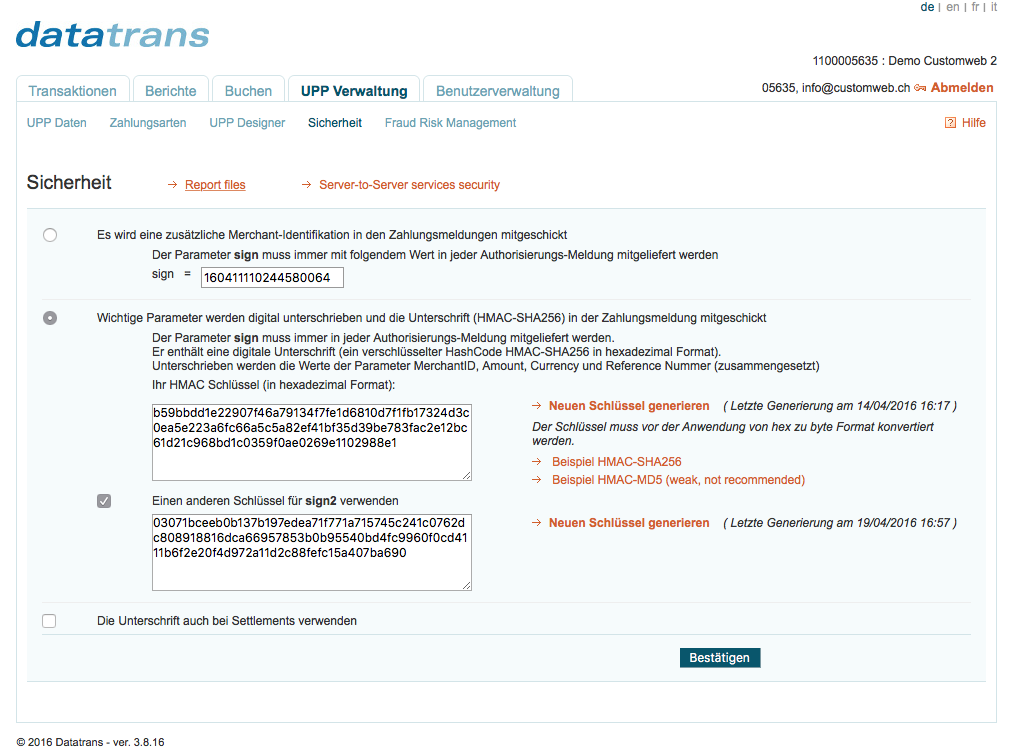
Switch into the tab UPP Administration > Security and click Security signature to setup the Hashes:
-
Click on Generate New Key in order to generate a new HMAC
-
Tick to use another key for sign2 and generate a sign2 HMAC
-
Copy the key into your configuration processor settings and save the settings in the Datatrans account.
Figure 1. UPP Security Settings
Switch into the tab UPP Administration > Security:
-
Select the check box for "Protect server-to-server services with password"
-
Copy the password to the Basic Authentication setting of the processor configuration.
|
Note
|
Once you have enabled server-to-server protection, it is not possible to disable this feature. If this option is enabled and the password is not set on the Processor, the connection will be blocked and the payment request cannot be completed as access will be denied. |
In order to configure the UPP Data for the payment notification switch into the UPP Administration > UPP Data tab. Here you can define your URL Post for the notification of payment transactions. All fields except URL Post should be filled with none.
In the URL Post Field enter the URL: https://app-wallee.com/payment/processor/datatrans/notify
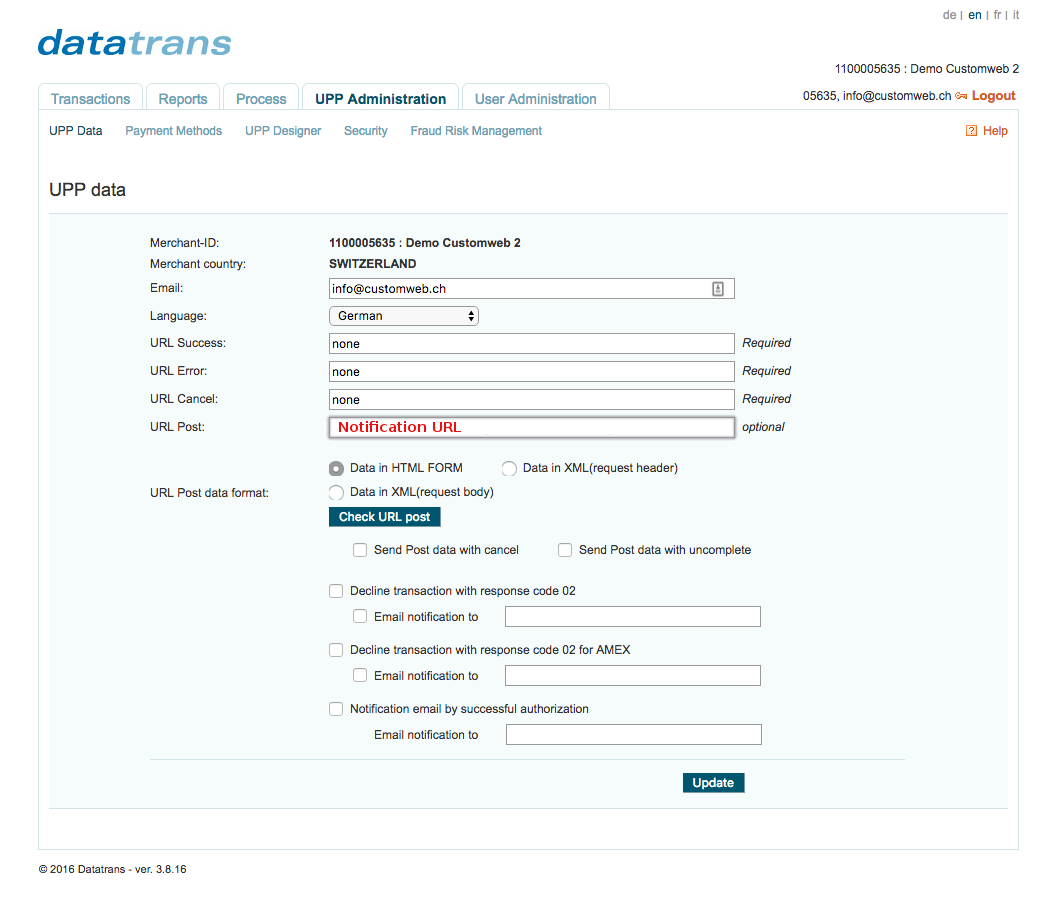
Figure 2. UPP Data Settings
In case you want use the Datatrans processor in connection with recurring payments and subscriptions you will have to get a dedicated merchant account from Datatrans that has the alias option enabled.
In order to do this set the Recurring Account Setting to use dedicated account and configure the account for recurring payment as described above.
If you have not already you have to create a payment method for all the payment types that you want to accept via Datatrans. In order to do this navigate to Space > Configuration > Processor > Payment Methods.
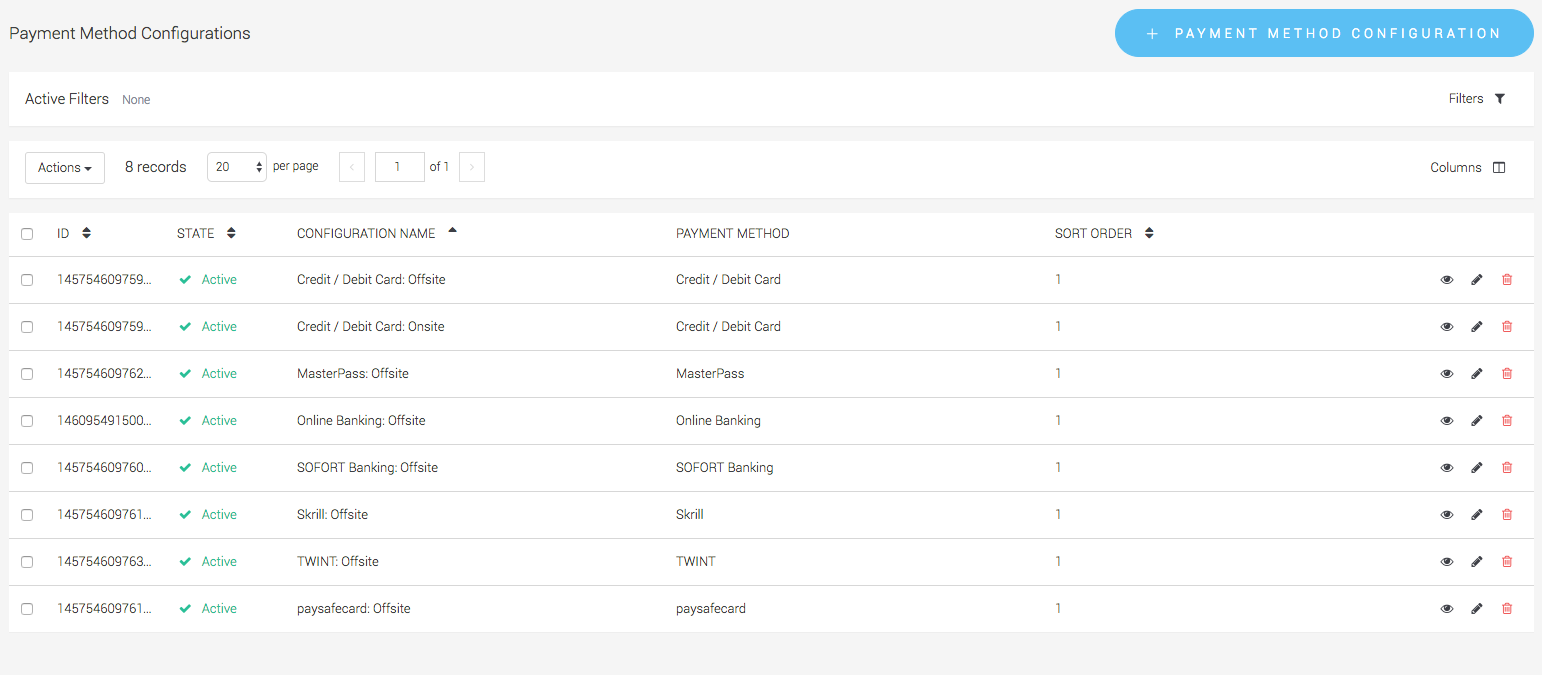
Figure 3. Create the payment method types for your account.
Last but not least you have to link the payment method with the processor configuration to a connector configuration. In order to do this navigate to Space > Configuration > Processor > Connector and create a new Connector Configuration. Make sure that you link every payment method type with the Datatrans processor that you want to process via the application.
For more information about the processor concept and how this work have a look at our Payment Documentation.
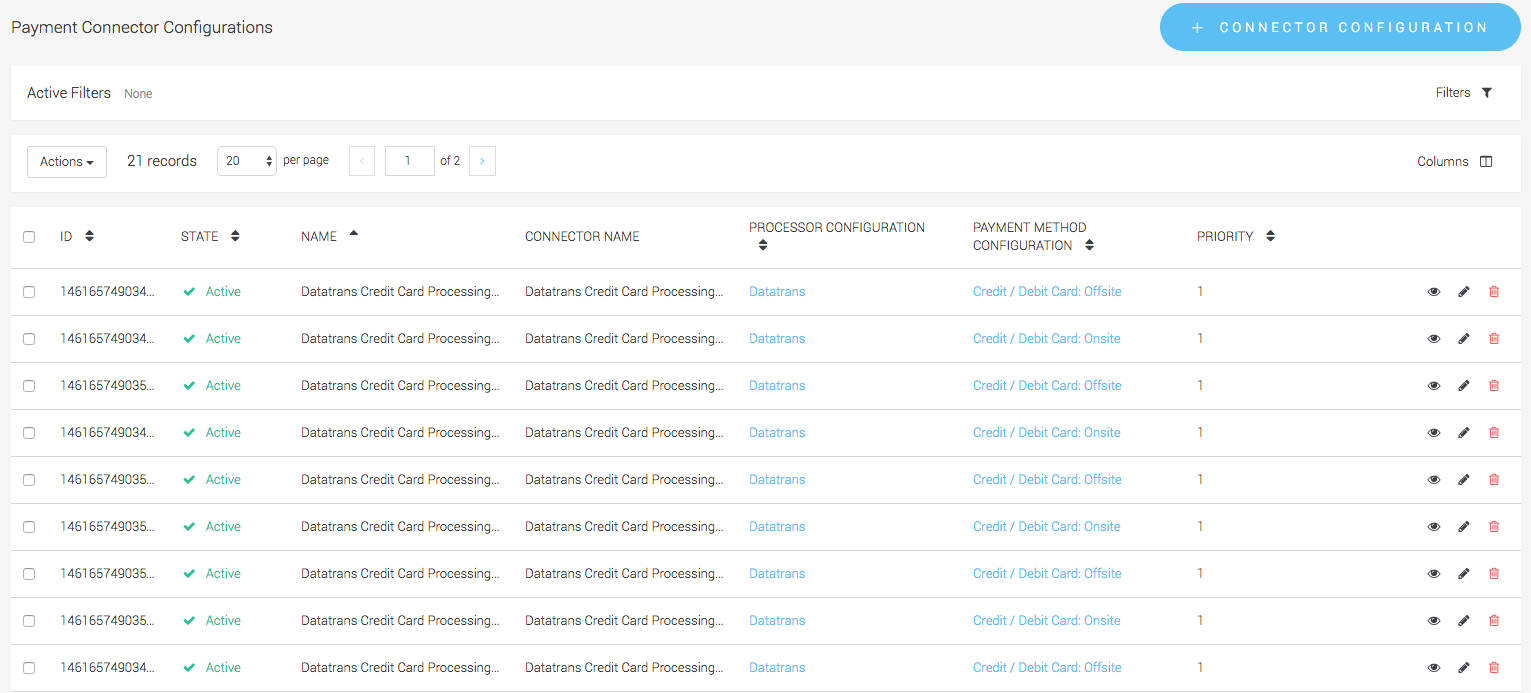
Figure 4. Create the connector configurations for your account.