Ecwid ist Teil der Lightspeed-Familie und behauptet, mehr als eine Million aktive Nutzer zu haben und zieht Unternehmen vor allem wegen seiner wettbewerbsfähigen Preisen an. Wir haben eine Integration in Ecwid gebaut, die es Ihnen ermöglicht, Transaktionen in Ihrem Ecwid-Shop über jeden integrierten Zahlungsprozessor abwickeln können.
Die folgende Dokumentation wird Ihnen Schritt für Schritt beschreiben, wie Sie das Zahlungsgateway in Ihren Shop integrieren können.
Bevor Sie Ecwid nutzen können, müssen Sie sicherstellen, dass das Ecwid-Feature aktiv und in Ihrem Menü sichtbar ist. Dazu müssen Sie zunächst in die Feature-Liste navigieren und das Ecwid-Feature unter Space > Features aktivieren. Hier finden Sie das Ecwid-Symbol. Klicken Sie auf die Schaltfläche „Aktivieren“.
|
Note
|
Falls Sie dort kein Ecwid-Logo sehen, kann es sein, dass das Feature in Ihrem Abonnement nicht aktiviert nicht aktiviert ist und Sie das Abonnement ändern müssen. In diesem Fall navigieren Sie zu Account > (Wählen Sie Ihr Konto) > Abrechnung. Hier können Sie auswählen, ob Sie Ihr Abonnement ändern möchten. |
Um die Anwendung mit Ihrem Ecwid-Shop zu verknüpfen, navigieren Sie zu Space > Ecwid und klicken Sie auf eine Integration hinzuzufügen. Wählen Sie einen Namen für die Integration.
Es ist möglich, Ihren Shop nur mit einer Shop-Ansicht zu verknüpfen. Dies kann nützlich sein, wenn Sie nur einige der Zahlungsarten in Ihrem Ecwid-Shop verwenden möchten, da alle aktiven Konfigurationen in Ihren Shop übernommen werden (siehe unten).
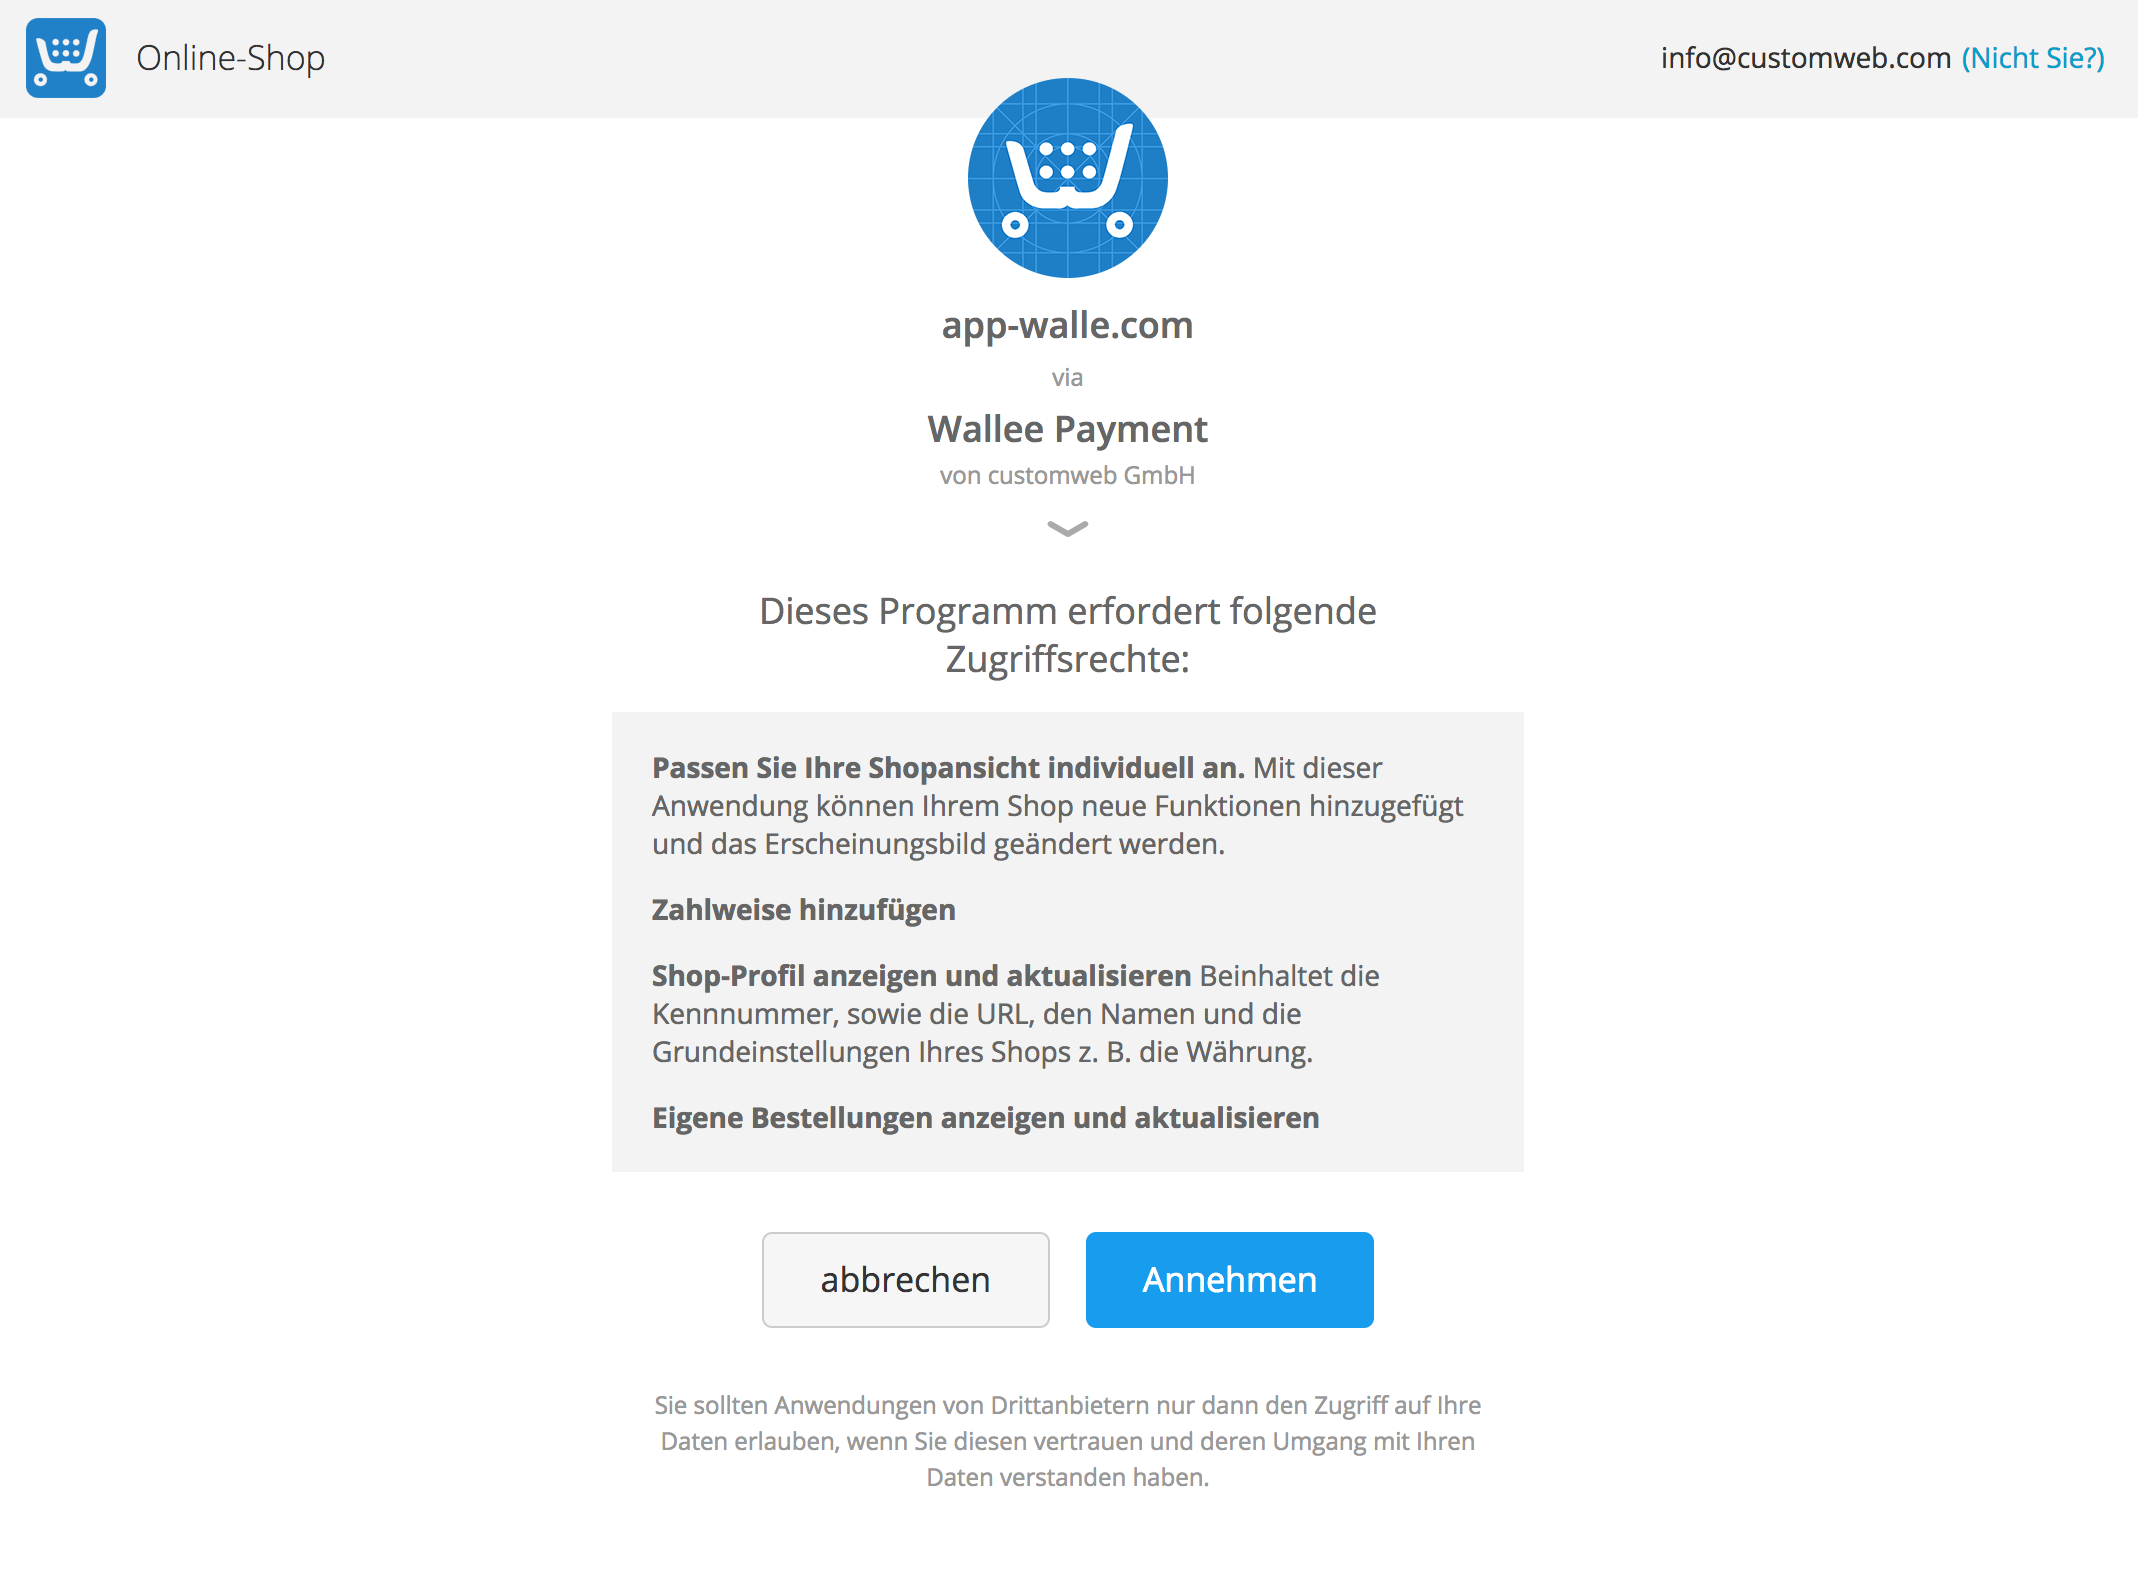
Nachdem die Ecwid-Integration erstellt wurde, müssen Sie die Integration mit Ihrem Shop verknüpfen. Dazu klicken Sie dazu auf link. Sie werden dann auf die Ecwid Login Seite weitergeleitet, wo Sie sich anmelden können und die erforderlichen Zugriffsrechte für unsere Anwendung erteilen können, um die notwendigen Änderungen vorzunehmen.
Figure 1. Erteilen Sie die erforderlichen Zugriffsrechte für die Anwendung.
Durch die Verknüpfung der Anwendung wird eine App in Ihrem Ecwid-Store installiert, die in Ihrem Ecwid-Backend unter Apps > Meine Apps zu finden ist. Dies ist auch der Ort, an dem Sie die App deinstallieren, falls Sie sie entfernen möchten.
|
Note
|
Die Deinstallation der Integration innerhalb der Anwendung führt nicht automatisch zur Deinstallation der App in Ihrem Ecwid Store. |
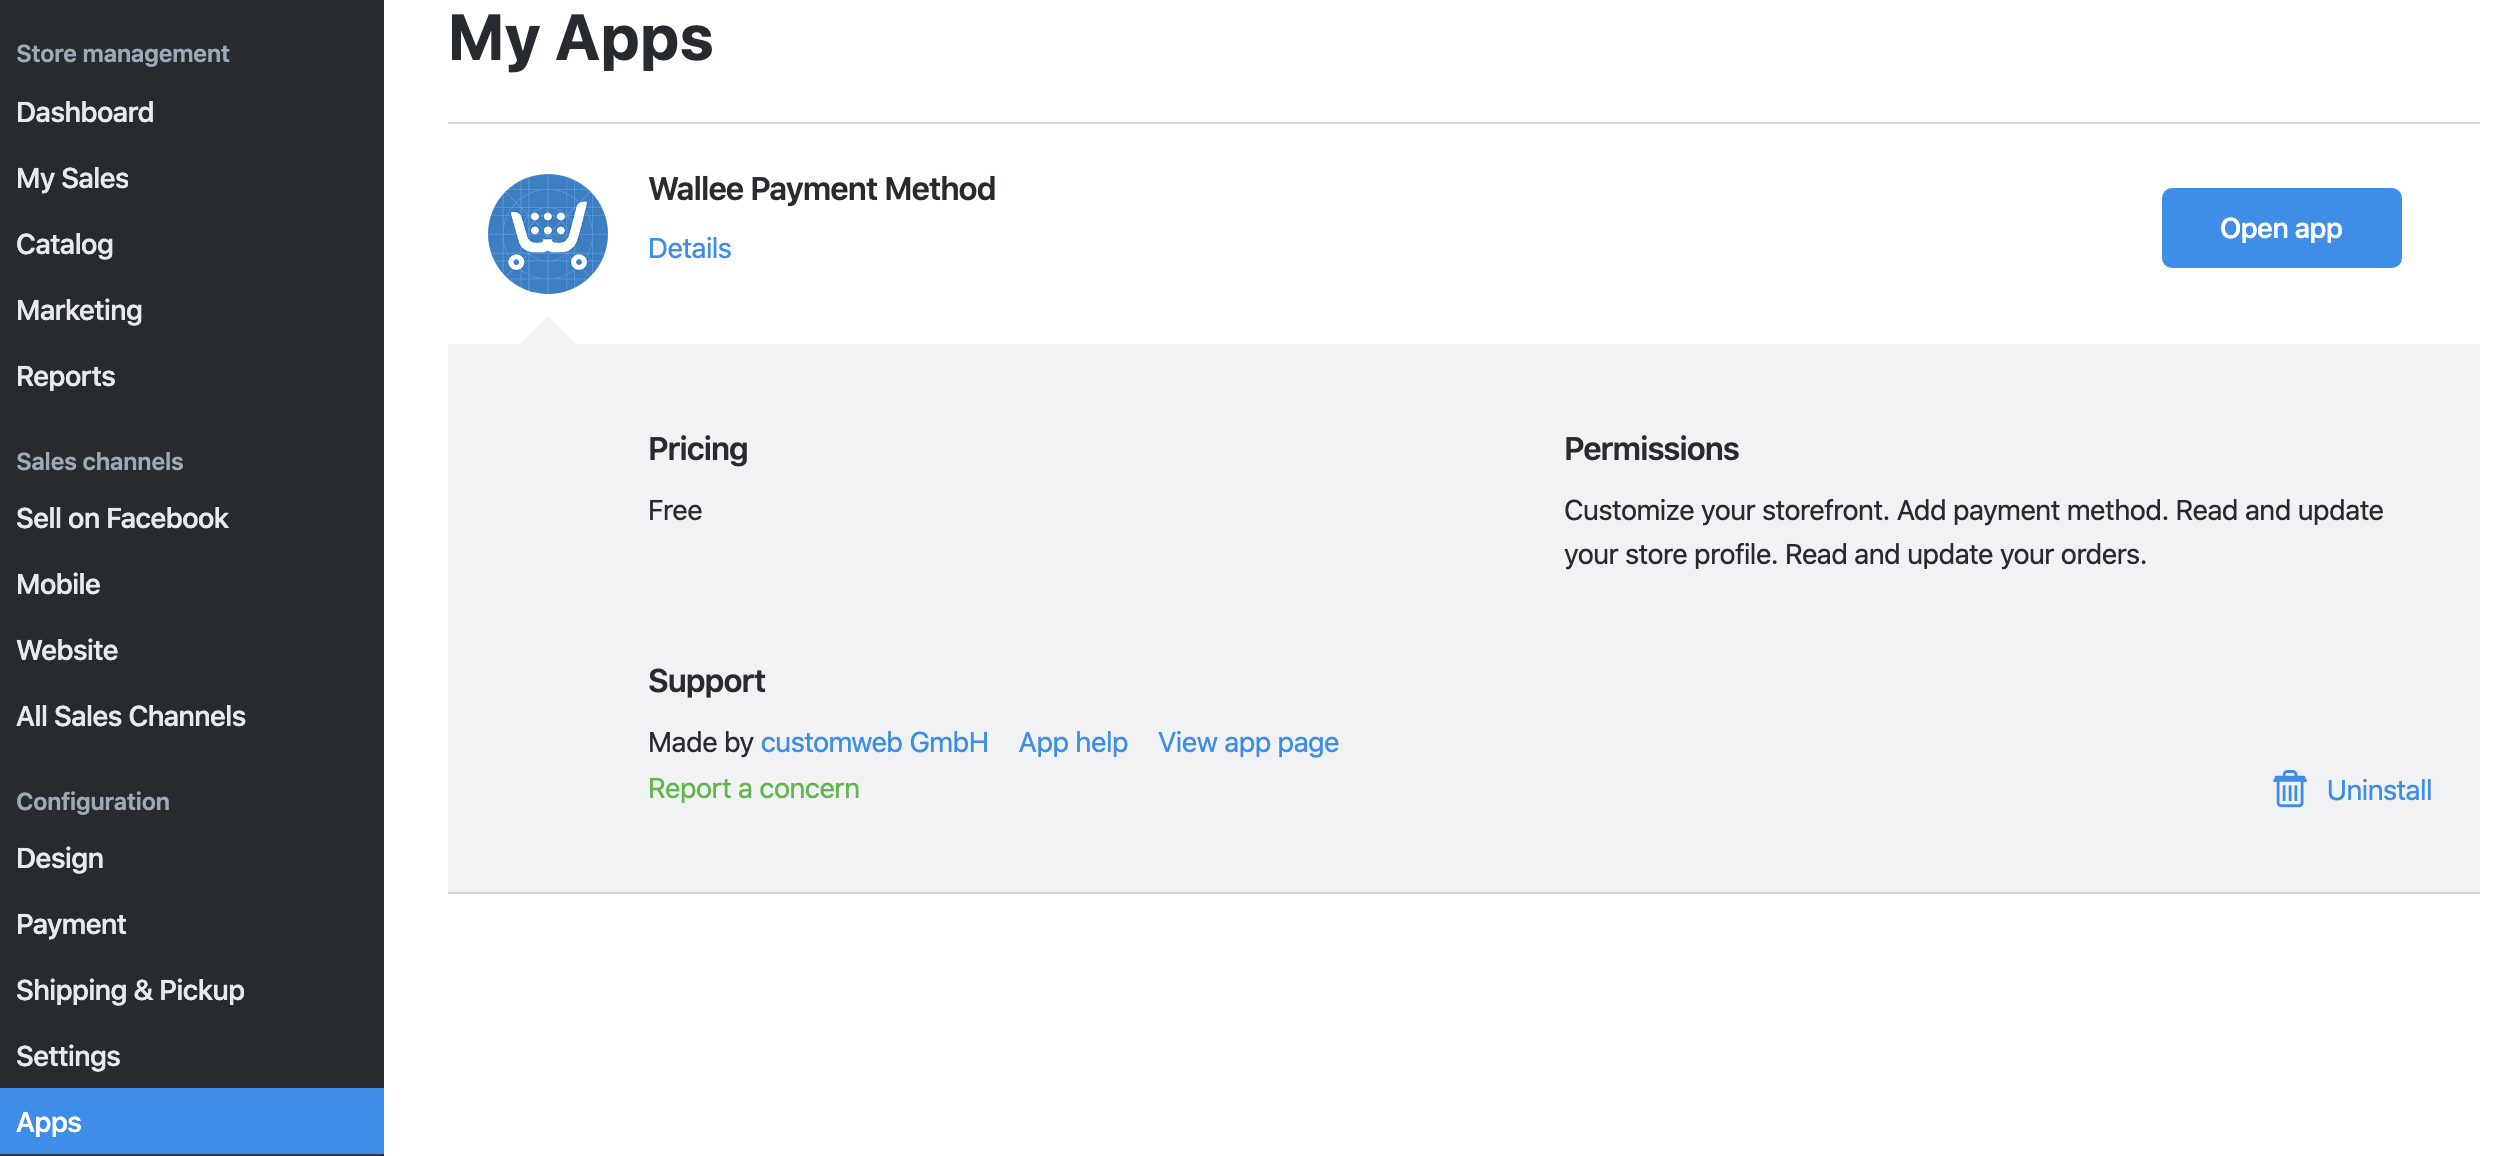
Figure 2. Zeigen Sie die Anwendung Wallee Group AG in Ihrem Ecwid Store an.
Sobald die App installiert ist, kann Ihr Kunde nun eine neue Zahlungsmethode auswählen. Sobald Ihr Händler die Zahlungsmethode in Ecwid ausgewählt hat, wird er direkt auf die Zahlungsseite weitergeleitet um die Kreditkartendaten einzugeben.
|
Note
|
Vergewissern Sie sich, dass Sie die Prozessorkonfiguration, die Zahlungsmethoden und die Konfiguration des Connectors für die Zahlungsarten, die Sie unterstützen, erstellt haben. Eine detaillierte Beschreibung und Anleitung zur Einrichtung der Prozessoren finden Sie finden Sie in unserem processor documentation. |
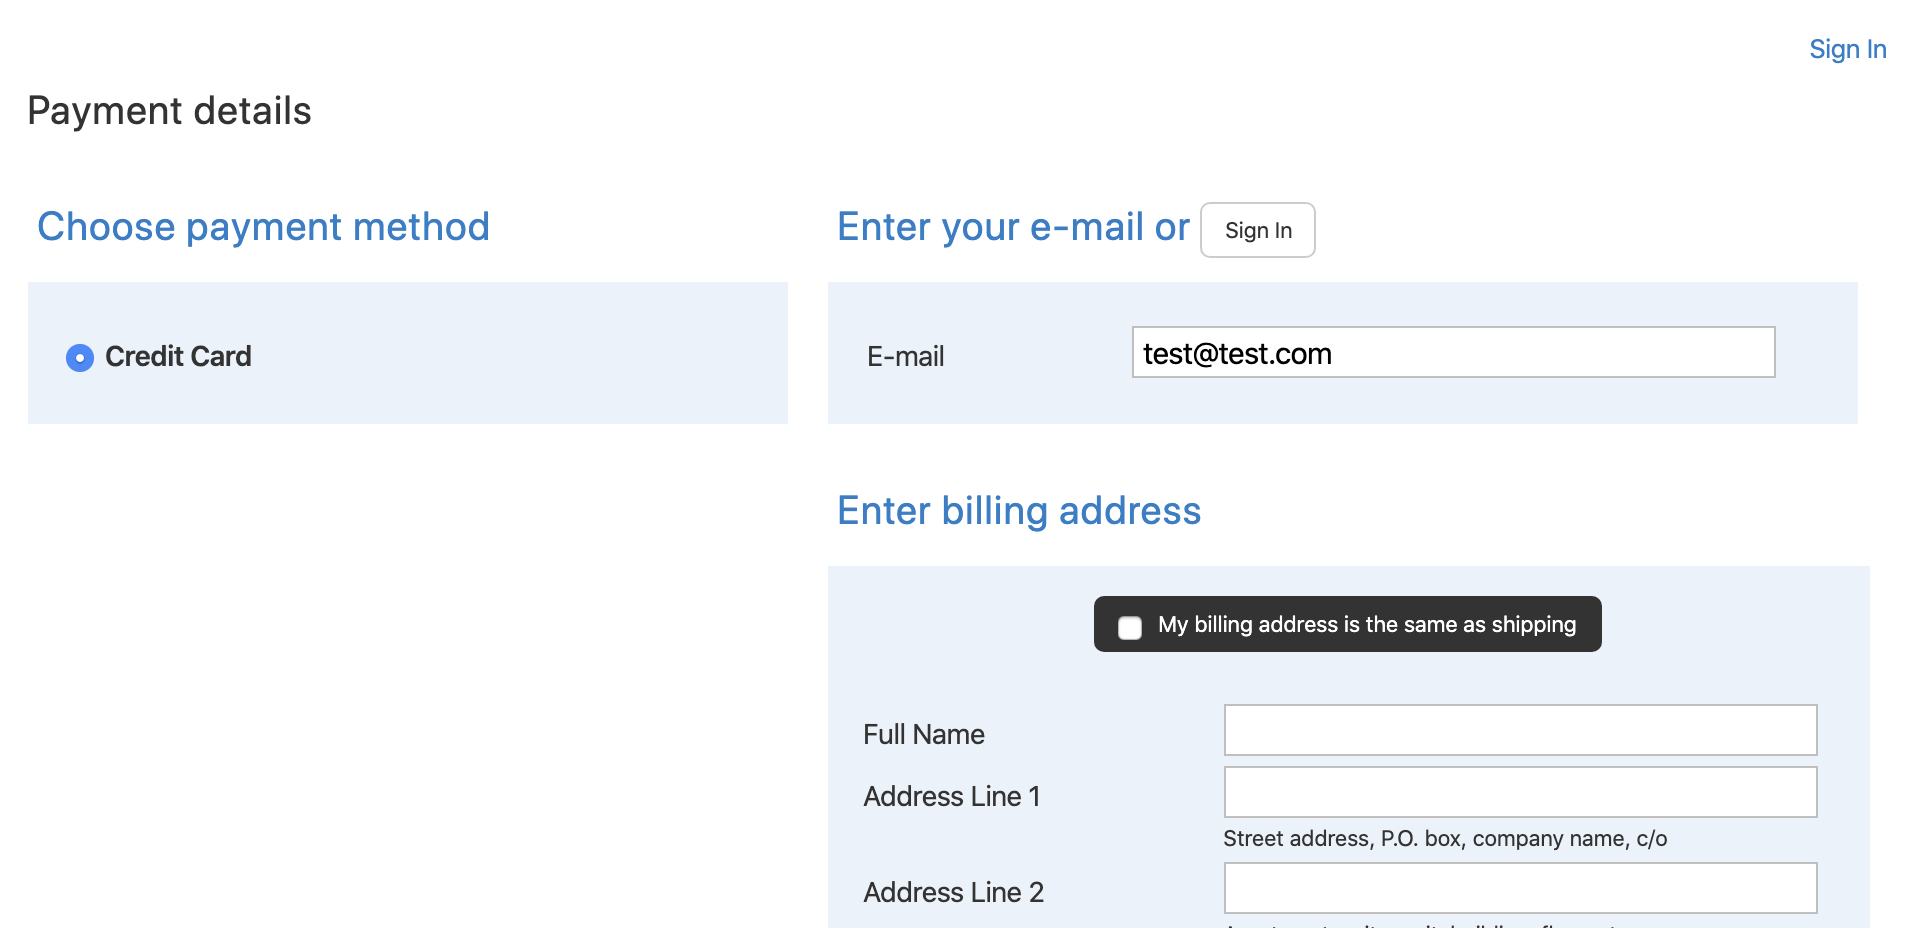
Figure 3. Die Zahlungsmethoden und die Zahlungslogos werden in Ihrem Checkout angezeigt. Neue Zahlungsarten werden automatisch sichtbar.
Sobald Ihr Ecwid-Shop verlinkt ist, werden alle Konfigurationen der Konnektoren automatisch in Ihren Ecwid Checkout übertragen und können von Ihren Kunden ausgewählt werden. Sie müssen diese nicht separat in Ihrem Ecwid Dashboard aktivieren.
Um Zahlungen über Ihren Zahlungsdienstleister zu akzeptieren, müssen Sie nur die notwendigen Konfigurationen in Ihrem Bereich erstellen. Mehr Informationen über unsere Konzeptprozessoren und die Konfiguration können Sie auf unserem Processor Documentation.
|
Note
|
Falls Sie in Ihrem Ecwid-Shop andere Zahlungsmethoden aktiviert haben möchten als allgemein in Ihrem Space, sollten Sie eine neue Space-Ansicht erstellen (unter Space > Space-Ansicht) und diese beim beim Erstellen der Ecwid-Integration oder beim Erstellen eines neuen Spaces (unter Space > Klick auf Erstellen). |
Sobald die Zahlung erfolgreich ist, wird die Bestellung in Ihrem Shop angelegt. Abhängig von Ihren Prozessen
wird die Zahlung entweder als Paid markiert, wenn der Transaktionsstatus innerhalb der Anwendung
auf Fulfill gewechselt hat. Andernfalls, falls Sie die Zahlung nur autorisiert haben, bleibt der Status der Bestellung
auf Wartende Zahlung.
Wenn Ihr Kunde die Transaktion storniert, wird die Bestellung in Ihrem Shop als "storniert" gekennzeichnet.
Erstattungen, Abschlüsse usw. werden nicht mit Ihrem Ecwid-Shop synchronisiert. Die Verwaltung der Transaktionen muss direkt in der Anwendung oder im Backend Ihres Prozessors durchgeführt werden. Siehe die referenzierte Dokumentation für weitere Informationen.