You can create your own Adyen account directly online. Go to https://www.adyen.com/signup and request a merchant account. After all information have been provided you will receive the information required to create the processor and connector configuration.
Once you have signed up for a merchant account with Adyen you will receive an email that contains all the necessary information to login into the Adyen merchant administration backend.
You have to distinguish between the Test and the Live Portal:
The administration access is needed to configure settings required for authentication.
First of all the Adyen processor has to be configured. In order to do this navigate to Space > Payment > Configuration > Processors . Click on the create processor configuration and type Adyen into the field to select the processor to start the configuration.
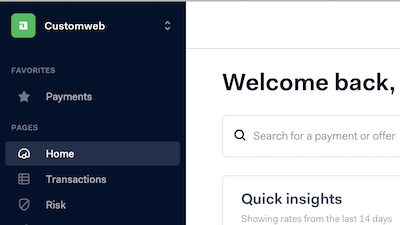
The merchant Account Name is provided by Adyen and is also visible in the backend of the account on the top left corner. For the configuration you have to switch into the Merchant Account you want to connect with the platform and provide this name also in the connector configuration.
Figure 1. Make sure that the correct account is chosen in the top left corner.
In the Adyen Backend navigate to Developers > API Credentials and select Create new credential. Here, choose to create a new web service user. Make a note of the user name which was generated by the system as you will need to copy it into the processor configuration.
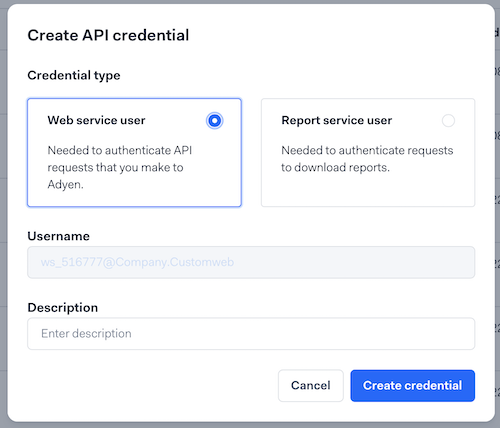
Figure 2. Choose the web service user and make note of the auto-generated username.
On the user create screen, do the following.
In the Server Settings / Authentication section, copy the generated API key and paste it in the processor configuration.
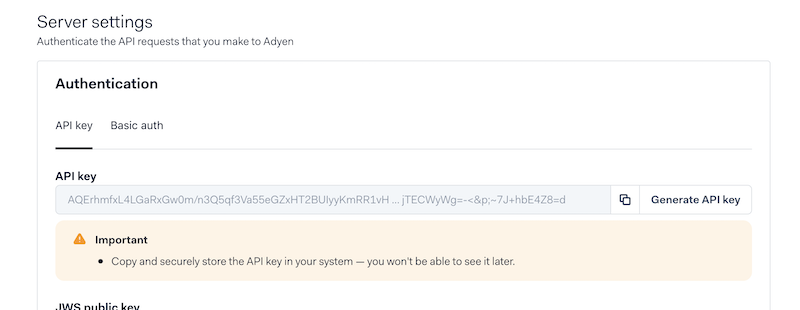
Figure 3. Copy the API key from here.
In the Permissions / Roles section set up the following roles:
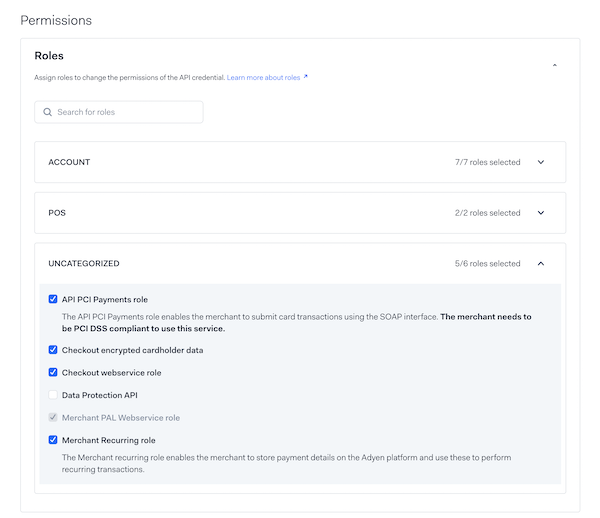
Figure 4. Set up the user roles.
If some roles are not showing up on the screen, please contact Adyen support to help you enable them.
Additionally, because you’re using the "API PCI Payments" role, Adyen may ask you to provide additional documentation to prove that you are allowed to use this role. You can find all information and documents that you can forward to Adyen on this page: https://en.wallee.com/legal/pci.
If you are using iDEAL payments, you need to select an additional role:
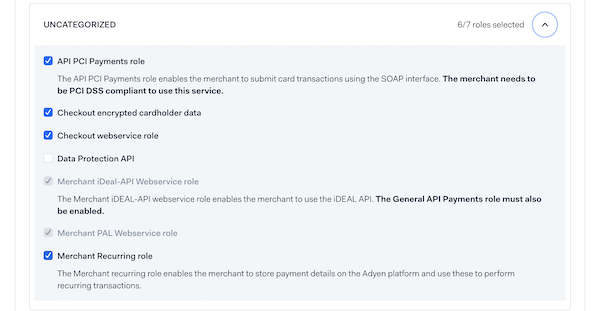
Figure 5. If you use iDEAL, set up the roles like this.
This role is only required for iDEAL payments. If this role is not showing on the screen, please contact Adyen support to help you enable it.
Don’t forget to click Save at the bottom to save the configured user.
Please first follow all the same steps you used to configure the test environment.
In addition, you need to configure the "URL Prefix" for the production API access. You can find your production API endpoint if you go to Developers > API URLs in your Adyen account. The URL will be of the form:
https://[random]-[company name]-pal-live.adyenpayments.com/[some_more_text_here]
The part [random]-[company name] should be copied as the URL prefix into your live payment processor settings on portal.
In order to be notified about the status of the payment transaction, it is important that the correct webhooks are setup on Adyen merchant backend. In order to create the webhooks navigate in the Adyen backend to Developers > Webhooks.
The following webhook types must be enabled for correct processing of payments:
-
Standard Notification: This is required to be enabled regardless of which payment methods are used. Note when setting up the standard notifications that there is a section on the page titled "Additional Settings" which you can expand by clicking on the small triangle, if it’s not already expanded. If you are using certain payment methods, you need to enable some options. In case you process credit cards including 3D Secure you have to active Include 3D Secure Result in the Additional Settings.
-
Ideal Details Notification: When using iDEAL | Wero payments, this additional notification type is required to be enabled.
-
Boleto Pending Notification: When using Boleto Bancário payments, this additional notification type is required to be enabled.
|
Note
|
If webhooks are not set up correctly, it will not be possible to process the payments and it may cause your Adyen account to be blocked from receiving any further notifications requiring you to contact Adyen support to resolve this issue. |
The following parameters must be set under General / Server Configuration for the correct processing of payments:
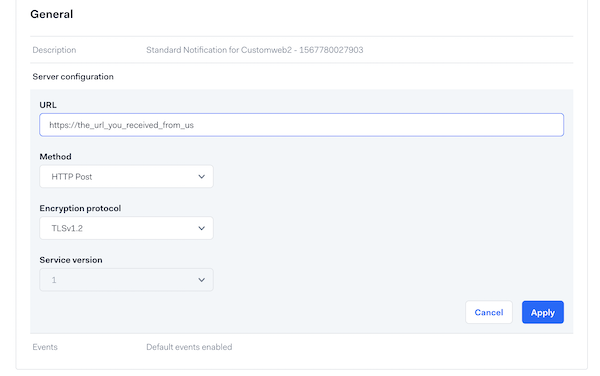
Figure 6. Configure the webhook endpoint.
-
The URL is specific to your space. We do show you the URL you have to type in the notification. Navigate to the notification setup page under Space > Payment > Configuration > Processors > Adyen Processor > Notification Setup . When you have multiple spaces you will be asked to select the space. The notification URL depends on the space.
-
Make sure you use the SSL Version of TLS 1.2.
-
Set the Method to HTTP Post.
-
You need to set a username and a password for Basic Authentication for payment status notifications. You can define those values as you wish just make sure you type the same details in to the processor configuration.
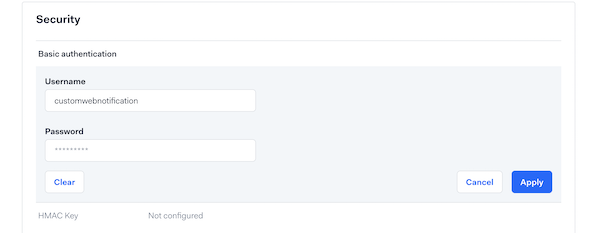
Figure 7. Configure the webhook username and password.
-
Additional Settings: When setting up the standard notifications that there is a section on the page titled Additional Settings. In case you are processing credit cards including 3-D Secure, you have to enable the option Include 3D Secure Result.
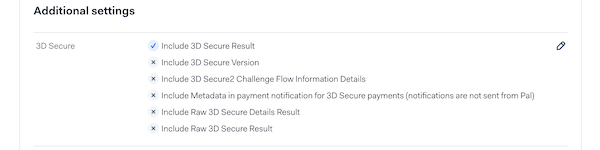
Figure 8. Configure the webhook additional settings.
Once you save the processor configuration you will be presented with the Connector Wizard. By clicking on activate portal will automatically create the payment method configuration and the corresponding connector in your account.
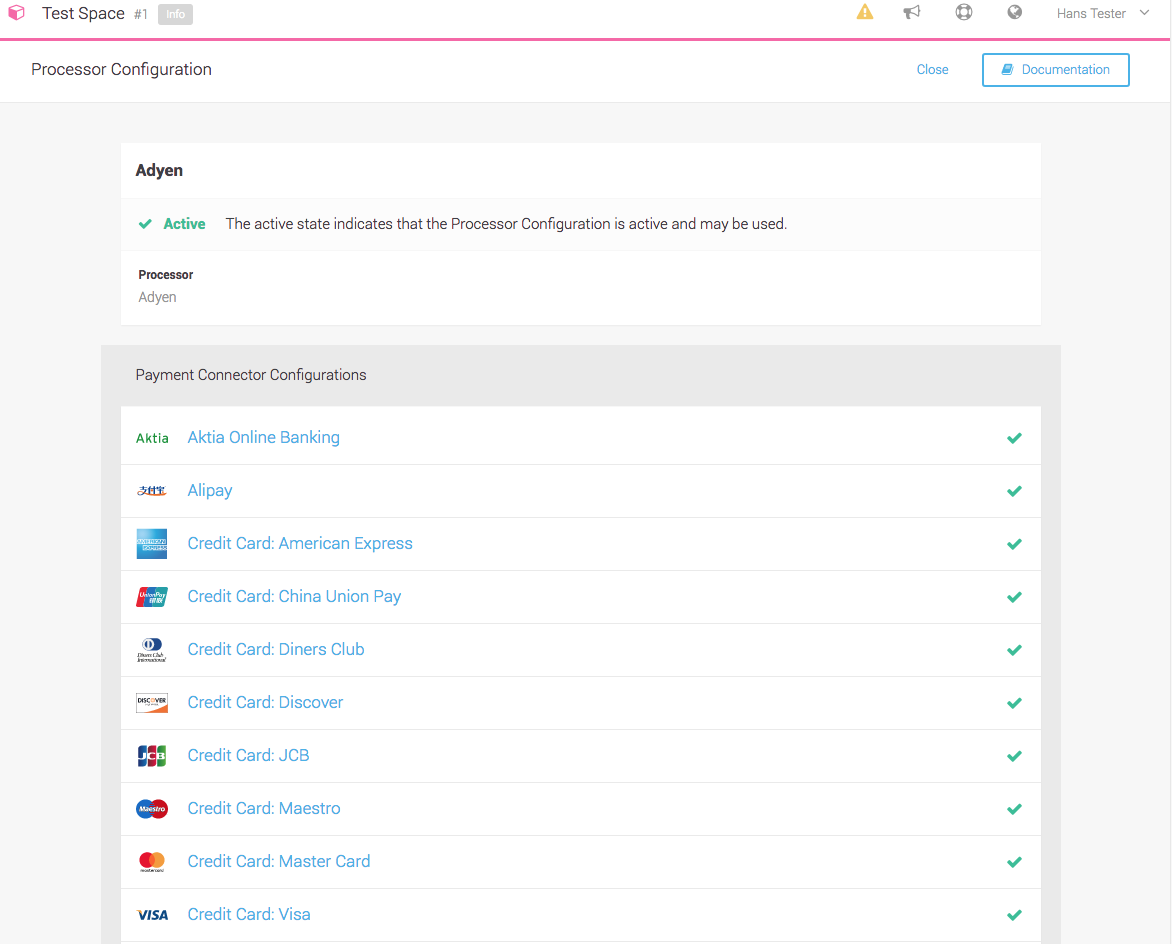
Figure 9. By activating the payment method in the wizard the payment method and corresponding connector will be created.
More Information about connectors, payment methods and processor can be found in the Connector Concept Documentation.
|
Note
|
Make sure that all the payment methods you activate in the application are also active in your Adyen account. In order to activate additional payment method you have to request this with the Adyen Support. |
The following additional settings will need to be enabled, depending on types of payments you wish to be able to process:
-
Recurring payments: If you wish to be able to process recurring payments, you must ask Adyen support to enable your account for this functionality; it is not activated by default.
-
3-D Secure: If you want to use the 3D-Secure authentication, you must ask Adyen support to enable your account for this functionality; it is not enabled by default.