In order to start processing payments via Ingenico (Ingenico ePayments E-Commerce) you will first have to to get a merchant account. This will then get you a PSPID and password.
The Ingenico (Ingenico ePayments E-Commerce) E-Commerce processor is the standard processor for Ingenico (Ingenico ePayments E-Commerce). It allows the processing of payments via the payment pages of Ingenico (Ingenico ePayments E-Commerce). This mens that in case you want to process credit cards without redirection to the payment page of Ingenico (Ingenico ePayments E-Commerce) you do have to use the DirectLink processor. Also in case you want to use the fraud features in the application for OnSite processing.
In the following documentation you find an overview of the configuration of the Ingenico (Ingenico ePayments E-Commerce) processor. Follow the guide step by step to set-up your account. In case a setting is not explicitly mentioned leave it as it is it has no effect on the configuration.
First of all you have to create a processor configuration in the application. Go to Space > Payment > Configuration > Processor to create a new processor. In case the Ingenico (Ingenico ePayments E-Commerce) is not visible in the list start to type the name and it should appear. Click on continue to start the configuration.
As next you have to set a PSPID a Has Algorithm and a SHA-IN and SHA-OUT passphrase. We recommend to use different SHA-IN and SHA-OUT Phrase and use SHA-512 as hash algorithm.
Now navigate to the backend Ingenico (Ingenico ePayments E-Commerce). Login with your PSPID and password and navigate to Configuration > Technical Information.
The next section carry the name of the configuration tabs and tell you for each configuration tab what needs to be set.
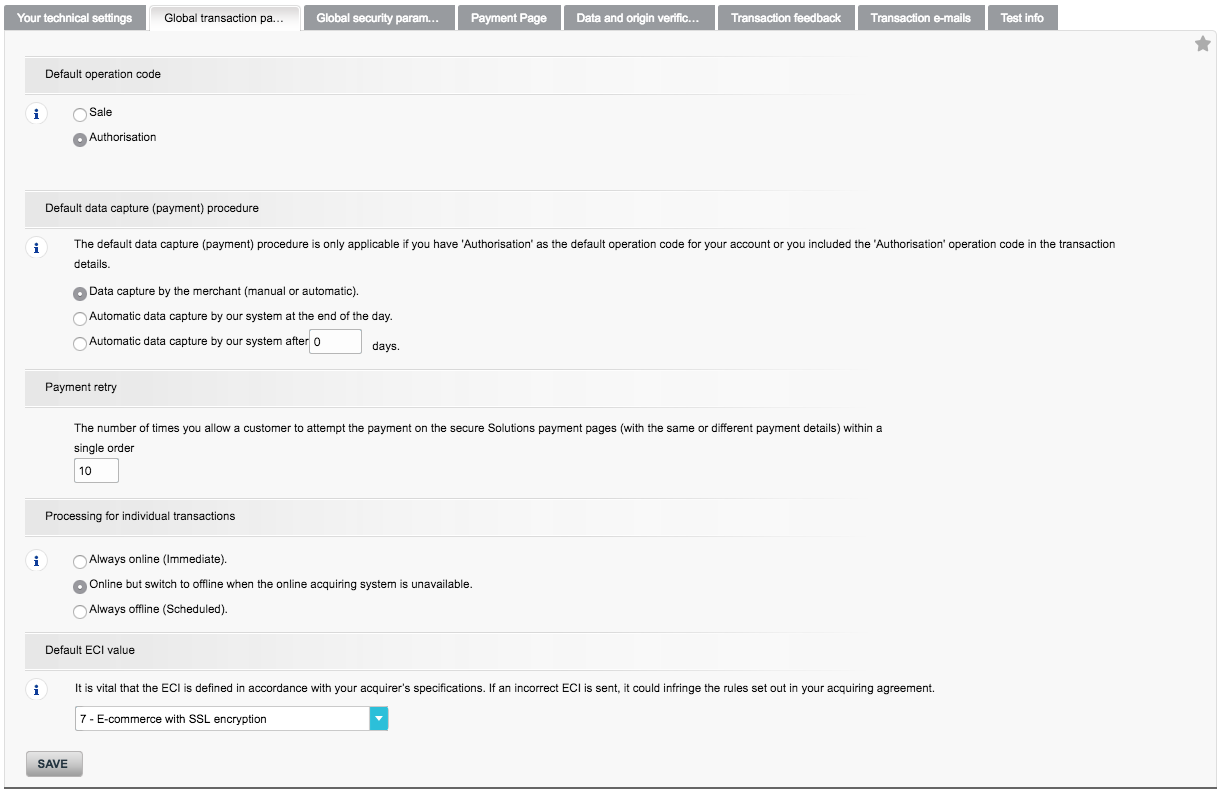
The global transaction parameter settings are global settings for your payment processing. Normally nothing has to be changed here. Have a look at the screenshot below that shows the standard settings.

In this tab you set the has algorithm and the encoding. Make sue that you set the hash algorithm identically (we recommend to set it to SHA-512) to your processor settings and the encoding to UTF-8.
This tab sets the security for the invocation of the payment page of Ingenico (Ingenico ePayments E-Commerce). Also here you have to make sure that you set the SHA-IN pass phrase identical to your processor settings in the application.

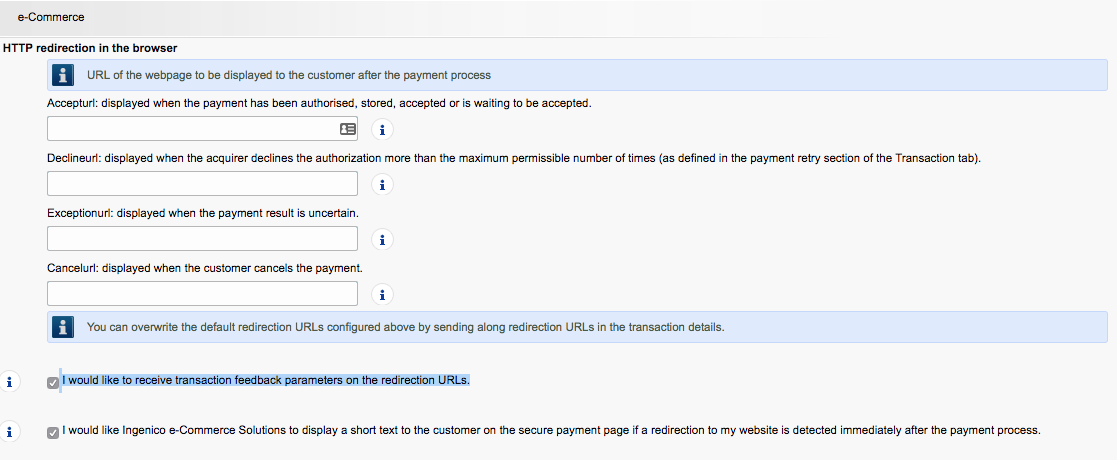
This tab contains the settings for the transaction feedback of successful or failed transactions to the platform:
-
Leave the HTTP redirection in the browser URLs field empty.
-
Make sure you tick the Setting I would like to receive transaction feedback parameters on the redirection URLs.

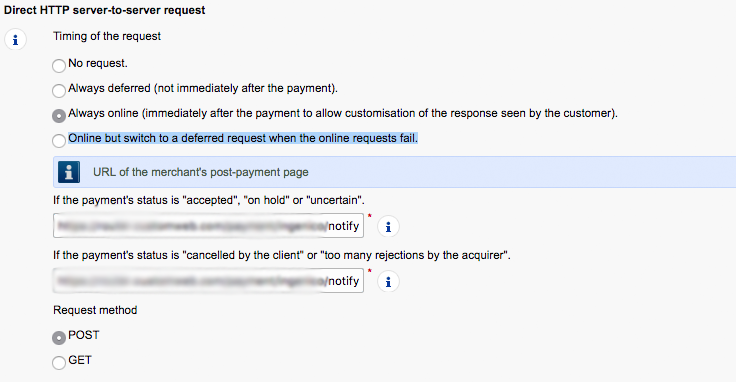
For the direct HTTP server-to-server request set the setting to Always online (immediately after the payment to allow customization of the response seen by the customer). of in case this setting is not available set it to Online but switch to a deferred request when the online requests fail.
In the Field URL of the merchant post-payment page you enter the following URL:

The dynamic e-commerce parameters can all be moved to the selected side. And make sure that you set the SHA-OUT signature exactly as in the application.
For the HTTP request for status changes select the option For each offline status change (payment, cancellation, etc.). and enter in the input field below the following URL:
In case you want to receive an e-mail for the processed transaction you can set here your e-mail address and you will be notified whenever you receive an payment.
Once everything is configured in the backend of Ingenico (Ingenico ePayments E-Commerce) you can continue to create the payment methods (if you haven’t already done that) in Space > Payment > Configuration > Payment Method.
After the payment method have been created you can connect the processor configuration and payment method in the connector configuration Space > Payment > Configuration > Connector.
